For my second project I decided to have a little bit of fun…and learn to embroider!
Here’s why I’m taking on this project:
- I am notoriously horrible at learning any kind of crafting skills.
- I’ve tried so many hobbies like this and given up out of frustration. Not this time!
- This is actually a skill I can use in the future. I mean, think of all the cute custom embroidery I can give as gifts.
- It’s the middle of my last semester…I need some fun in my life.
Let’s get this started!
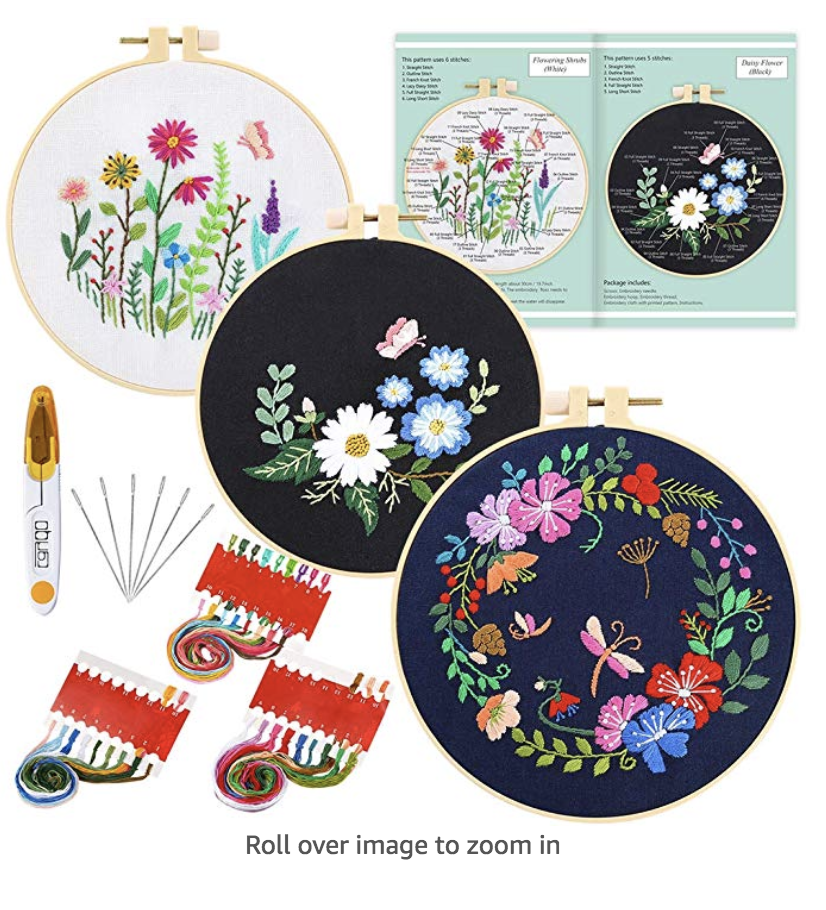
Here’s the kit I ordered:
I started by reading through the instructions and guide to the different kinds of stitches. The instructions were a little vague about how to actually get started. I quickly learned that I am terrible at threading needles…so I was already frustrated from the start.
I decided to start with the most basic looking type of stitches: the outline stitch and the straight stitch. My first attempts weren’t so bad, but I definitely improved as I continued on. In the picture below, my outline stitches on the left sides are pretty wobbly and uneven. The two outline stitches on the right are looking slightly better.

I was proud of myself for how quickly I was improving.
I completed all of the darkest green color stitches first, according to the provided color guide. It took me like an hour and a half…not great. But by the time I completed the next color, I was moving so much faster.

Not too bad, right?
I did see some areas where I can work to improve next week:

The straight stitches in the flower were supposed to go all the way into the center but I didn’t get them close enough at all. The stitches on the leaf are my first attempt at the full straight stitch, but you can see the gaps between the threads and it looks pretty uneven. Next week I’m going to find some other resources to help me learn how to make the leaves look more “filled in” and natural.
